I have been tying flies for almost 30 years now. I couldn't even guess how many Irish Shrimps I've attempted in that time. Thousands probably.
As I've said before on previous posts, no one ever taught me to tie flies. I started tying in the mid 1990's before youtube, social media and internet forums. I was able to get feathers and other materials onto a hook and was able to catch fish so I was happy enough but I always want to improve. My flies didn't look like other peoples, or the one's you could buy in the shops, or the ones you could see in Trout & Salmon magazine.
It really is only in the past 10 years or so that things have started to fall into place and I've learned techniques that help with how a fly looks. I've also discovered that materials really do make a difference and none more so than a good quality Golden Pheasant body skin for tails on Irish Shrimp flies.
I get quite a few compliments about how the tails on my flies look. I know what a few people must be thing when I tell them that the quality of the feather really is half the battle and I hope that this post will make that a bit clearer.
I really didn't think that there was any difference in skins in the past. Honestly, I'd just walk into my local tackle shop, grab the first Veniard's skin I saw and just tie with it. It was the same in later years when I bought them off the internet. I'd just order a GP skin and use whatever arrived.
I really got my eyes opened though about 3 years ago when I was ordering some materials from Steve Cooper at Cookshill Fly Tying. I was ordering a few bits and pieces and ordered a GP Skin as part of the order. It was almost like a revelation. For the first time in my life, the tails looked exactly how I'd pictured them for years in my head. Lovely soft fibres that curved beautifully for the shank of the hook and fluttered nicely even in a gentle breeze. With that skin, I probably tied the nicest looking Irish Shrimps I had ever tied. In my own opinion anyway.
 |
| Apache Shrimp with a nicely curved tail |
That skin was used up so I needed a new one. I got back in touch with Steve at Cookshill and mentioned that I had just used the nicest Golden Pheasant I had ever used and he said that unfortunately, he had no 'good ones' left and was finding it difficult to source. I told him I needed a skin anyway and to send me what he had. The difference between the two skins was stark. Thick stalks, stiff lifeless fibres, it really was difficult to get a nice looking fly with that skin.

Now, in no way am I running down Steve here. He was good enough to tell me he had no good skins left and I ordered it anyway. I have ordered from him since and will certainly order from him again in the future. His materials really are first class.
That was the last GP Skin I'd bought and I am now wary of buying GP Skins randomly as I now know the difference between a really good one and an ordinary one. Then I was contacted one day by a really decent chap who I've come to know on the online Salmon Fishing Forum. He told me that he'd bought two good quality skins and was only keeping one of them. He offered me the other one and I almost took the arm and all off him. It arrived last week so I thought I'd use it to try to show the differences between a good GP Skin and an ordinary one.
I know that not everyone will agree with this and everything I write here is based purely on my own opinions.
Right through the following set of photos, I've tried to keep everything from each skin in the same position. Everything to do with the feather of each skin will be kept in the same position with the ordinary skin on the left and the better quality one on the right.
So here are the two skins I now have. The poorer quality one on the left and the better quality one on the right. Pay no heed to how they look here. The one on the left has been used quite a bit and has been in and out of a drawer for well over a year. The one on the right was just removed from its cover so will always look better.

I'll now pick a feather from each skin of roughly the same length. I don't remove a feather from the skin as I measure them against the hook. I place the middle stalk of the feather just benind the eye of the hook and I want the feather fibres just to slighlty longer that the bend of the hook. This is something I do with all my shrimp flies to keep the tail in proportion to the hook. Nothing look worse to me than a size 12 shrimp with a size 6 tail.

I now have two feathers, one from each skin

On a closer look, you can see that the stalk gets thicker much sooner along the stalk than the one on the right. The one on the right is much thinner throughout it's entire length.

I really should have taken a video instead of the next picture to show the difference in movement of the two feathers as they were moved. The thinner stalk gave more of a slow pulsing action whereas the thicker stalk was more like the action of a metallic spring.

The two feathers now with the waste material removed. You can see the one on the right has a webbier looking fibre than the one on the left.

Bother feathers doubled. The softer fibres didn't double as well as the stiffer ones for some reason.

So now it comes to tying them in. In both cases I'll use a size 6 Mustad 80525 hook with a rib already tied in and both are now ready for the tail

I'll start with the feather on the left. I always tie my tail in by the tip of the feather. I know some like to tie in by the stalk and that's fine. Each to their own. When I have wound on my tag, I secure the tag material in place with three forward turns of thread. At this point, I'll tie in the tip of the feather by winding three turns of thread back towards the tag.

Next, I'll fold the tips of the feather back towards the tail and wind three turns of thread forward again. This really helps to keep the talk in place. The space now between the tag and the thread will be the space I'll wind my tail onto.

I was just taking these pictures with my mobile phone so it was very difficult to take a picture after each wind of the feather. So, we jump ahead now to three turns of the feather and it being secured in place with three turns of thread.

You will notice that the thicker stalk leaves quite a big bump.

The stalk has now been cut and the bump levelled out a bit. You are now ready to tie the rest of the fly on this hook. Now we'll look at the other feather.

Feather has been tied in and secured and is ready to be wound

After three turns and secured with three turns of thread, you can already see the nice gentle, natural, curve of the fibres as they slope gently upwards away from the hook shank before dropping back downwards again towards the tips. Guaranteed movement.

Look at the difference in thickness between the two stalks.
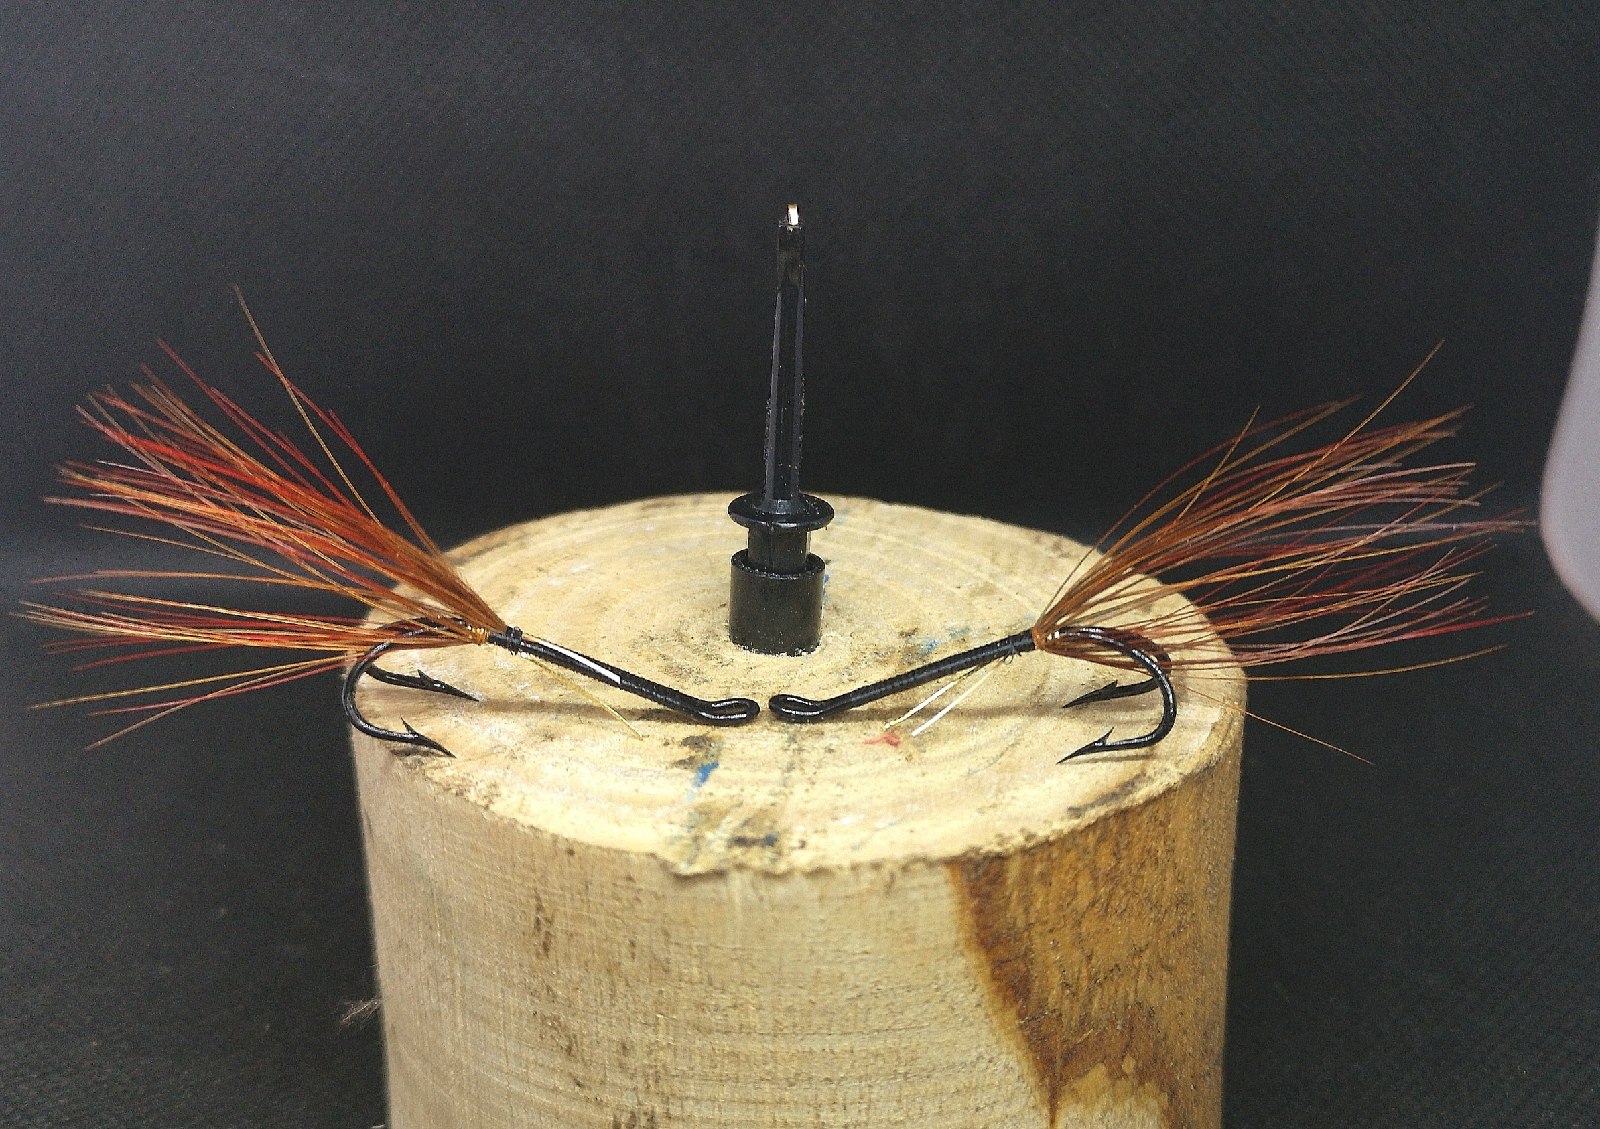
And here we have the two tails side by side. The one on the left has much stiffer, straighter, fibres whereas the one on the right has much nicer curve to the fibres. I know which one I prefer personally.
Now, the thing to remember here is that both will probably take as many fish as the other. In fact, if I know I'm going to fish a very heavy stream, I'd probably use the tail on the left. If on the other hand I'm going fish much slower water, I'd always prefer the one on the right for the extra movement. But that's just me.
I know I've went slightly OTT above but hopefully now you will see my views on what makes a nice Irish Shrimp tail.
Thanks for reading and I hope you enjoyed it.
Excellent
ReplyDeleteThanks Gary!
DeleteThanks Gary!
Deletetop class demonstration
ReplyDeleteThank you angleronnie!
Delete