
I've been quite busy recently and didn't really have a lot of time. I didn't fish much last season either and my clay shooting is now down to once a month so not a lot the write about there either.
I hadn't tied a lot of flies either. I had lost the bug there for a while but I recently decided to put a box of Irish Shrimps together and I'm tying a couple of flies for it every day now and it's nice to be back at the vice again.
I've posted a few of Shrimps online and one question that seems to come up quite regularly is, "How do you keep your heads so small?".
I don't honestly remember setting out to tie smaller heads. It just seemed to happen as I got better at tying flies over time. I probably caught as many salmon on flies with heads like rugby balls than I have on my neater heads now but, I must admit, they are better on the eye than those flies with a rugby ball behind the eye of the hook.
I'm always looking to improve my tying as much as I possibly can. Even today I'm trying different little ideas and techniques to improve on things where I feel I'm not quite doing things right.
It's one of the things that I love about fly Tying. There is always something to try to improve things. Always trying things. Sometimes failing. Sometimes achieving small areas that allow you to improve your skills. Always challenging yourself to be better.
One issue I always had with my tying was not leaving enough room for a head. I'd finish a fly and barely have room to be able to get my leader through the eye. The thread was so far up the eye that it completely ruined to look of the overall fly.
From reading many threads and posts online, and following plenty of step by steps, I learned that leaving an area of the shank, behind the eye of the hook, completely clear helped in keeping the thread away from the eye. This also contributed to keeping heads smaller for me too.
A small, neater, head has just become part of my overall tying. This comes from using the least amount of turns of thread as possible adding and tying off materials.
I think it was Ally Gowans that said in his video of him tying his most famous shrimp, that "...fly tiers can't count past three". It is something I took on board and it has certainly helped in my overall tying.
It is quite difficult to explain so as I was tying a fly for the box yesterday, I thought I'd take photos of every step of the process.
These photos are not the best of quality. They are straight off my phone but hopefully they'll be clear enough that you'll get the gist of what I'm trying to get across.
First things first, put a hook in the fish and wind on your thread

Notice that there is a section of the shank left clear behind the eye of the hook and the start of the tying thread. I'll try to leave that clear for as long as possible for the head.
I now tie in my tag material at this point

Now wind thread in touching turns right back to the bends of the hook. This will both leave a good secure tag and a nice level base for the body of the fly

This is now the first time that I'll count to three. I'll wind my thread forwards again, towards the eye, for three turns.

The distance between where the thread is now and the oval tinsel is exactly the length that my tag will be. So go ahead and wind the oval tinsel forward in touching turns.

Three turns of thread, in touching turns forward towards the eye is all that is required to hold the tag in place for the minute. It will be secured firmly in later steps. You can go ahead now and cut the oval tinsel. I'll leave it the length of the red thread base. This will firmly secure the tinsel and help with leaving an even base.

So that is your tag in place. Now I will set about adding my tail. As is is an Irish shrimp pattern, I'll be using a Golden Pheasant red breast feather.
I'll go into a bit of detail here about selecting a feather and preparing it for tying in. Feel free to skip on down the page until the tying starts again.
I personally don't like a very long tail on my shrimps. The length of the hook or just slightly longer is perfect.
One way to decide which feather to use is simply to put the feather beside the hook and check the distance from the stem of the feather to the tips of the feather fibres.

I've tied so many of these now that I can usually tell if a feather is long enough just by looking at it. It does no harm to check though.
Now it's time to prepare this feather for tying in.
Start by pulling the fibres down towards the base of the stalk.

These feathers are set of strung feathers and the stalks are quite short. In this case I'll have to use my hackle pliers to hold the stalk

I'll now attempt to double the hackle. Doubling the hackle, any hackle, is such an important thing to learn. It just makes winding hackles on so much easier.
The pictures of the doubling process aren't great. I had no way of holding the pliers in on hand, hackle tip in the other, try to double the hackle and take a picture at the same time. But, I will try to explain the process.

Hold the hackle pliers, or just the stalk of the feather if they're long enough, in your left hand. Grab the tip of the feather with the thumb and forefinger of your right and draw the fibres through the fingers of your right hand, the one holding the pliers.

Just to give some indication of what I mean. I should be holding the tip above with my right fingers while stroking the fibres back and down with the fingers of my left hand.

If you've managed it, your feather should now look like the above.
Now we will get to actually tying it in.

Line the tip of the feather up with top of the shank. Look closely at the above photo. Zoom in if you have to. Note the the first fibres of the hackle are lined up with end of the tag and there is a small gap, the three turns are currently holding the tag in place, between the tag and the thread.

Now wind the thread for those three turns back towards the tag.

Pull the tip of the hackle back over on itself

Then wind the three turns forward again towards the eye. That gap you have just left between the tag and the thread is the distance that winding our tail will cover.
This is how your tail should now look.

Now we'll remove the hackle tip as it is no longer needed

And we can now go ahead and wind on the tail. Each turn of the tail should be wound forward in touching turns towards the eye. It does no harm to pull the fibres back towards the tag as you are winding it on.

Three turns should be more than enough of the hackle. I'll now stop the fibres thst I don't need off the hackle

Now make three turns of thread forward towards the eye, just to hold the stalk in position. We'll secure it in future steps.
I now like to pull the hackle stalk up so that it will sit on top of the shank

I usually remove the hook from the vice at this point just to tiby up the tail and make sure I'm happy with it before doing anything else.

I'll now add my rib material

And now wind thread forward to the middle of the shank in touching turns securing the tag material, rib and the stalk from the tail securely. This also helps to leave a nice even base for the body.

You can now cut the waste ends of the stalk, rib and tag.

This fly will have a floss body. I will now tie in the floss for the rear body.

Wind the floss in touching turns towards the tail

And then wind it forward again towards the eye

Three turns of thread to hold it in place and cut it off roughly the length of the red thread base

Now wind on the rib and hold it in place with three turns of thread and cut it the same length as the base of thread

Now add your middle hackle. In this case yellow. I'll not go into a lot of detail here as this hackle followed is the same process as the tail.
Hackle is tied in by the tip with three turns of thread, tip folded back and the thread wound forward three turns again. Then the hackle wound forward in touching turns and held in place with three turns of thread.

Now tie in the rib material

Wind the thread back towards the middle hackle. You can now cut away any ends of tinsel or anything behind the eye of the hook.

Now tie in the red floss for the front body just in front of the middle hackle.

Wind the thread forward again in touching turns towards the eye. Securing the floss in place.
You can then wind on the floss body. Holding it in place with three turns of thread

Now wind on your rib and again, three turns of thread to hold it in place
Now add the front hackle in the same way as the tail and mid hackles.
Three turns of the hackle. Three turns to hold it in place.

As I no longer have any room to secure the hackle in place by winding forward in touching turns, for the front hackle only, I'll pull the stalk back towards the tail and give three touching turns backwards towards the tail.

You can now cut off the waste material.

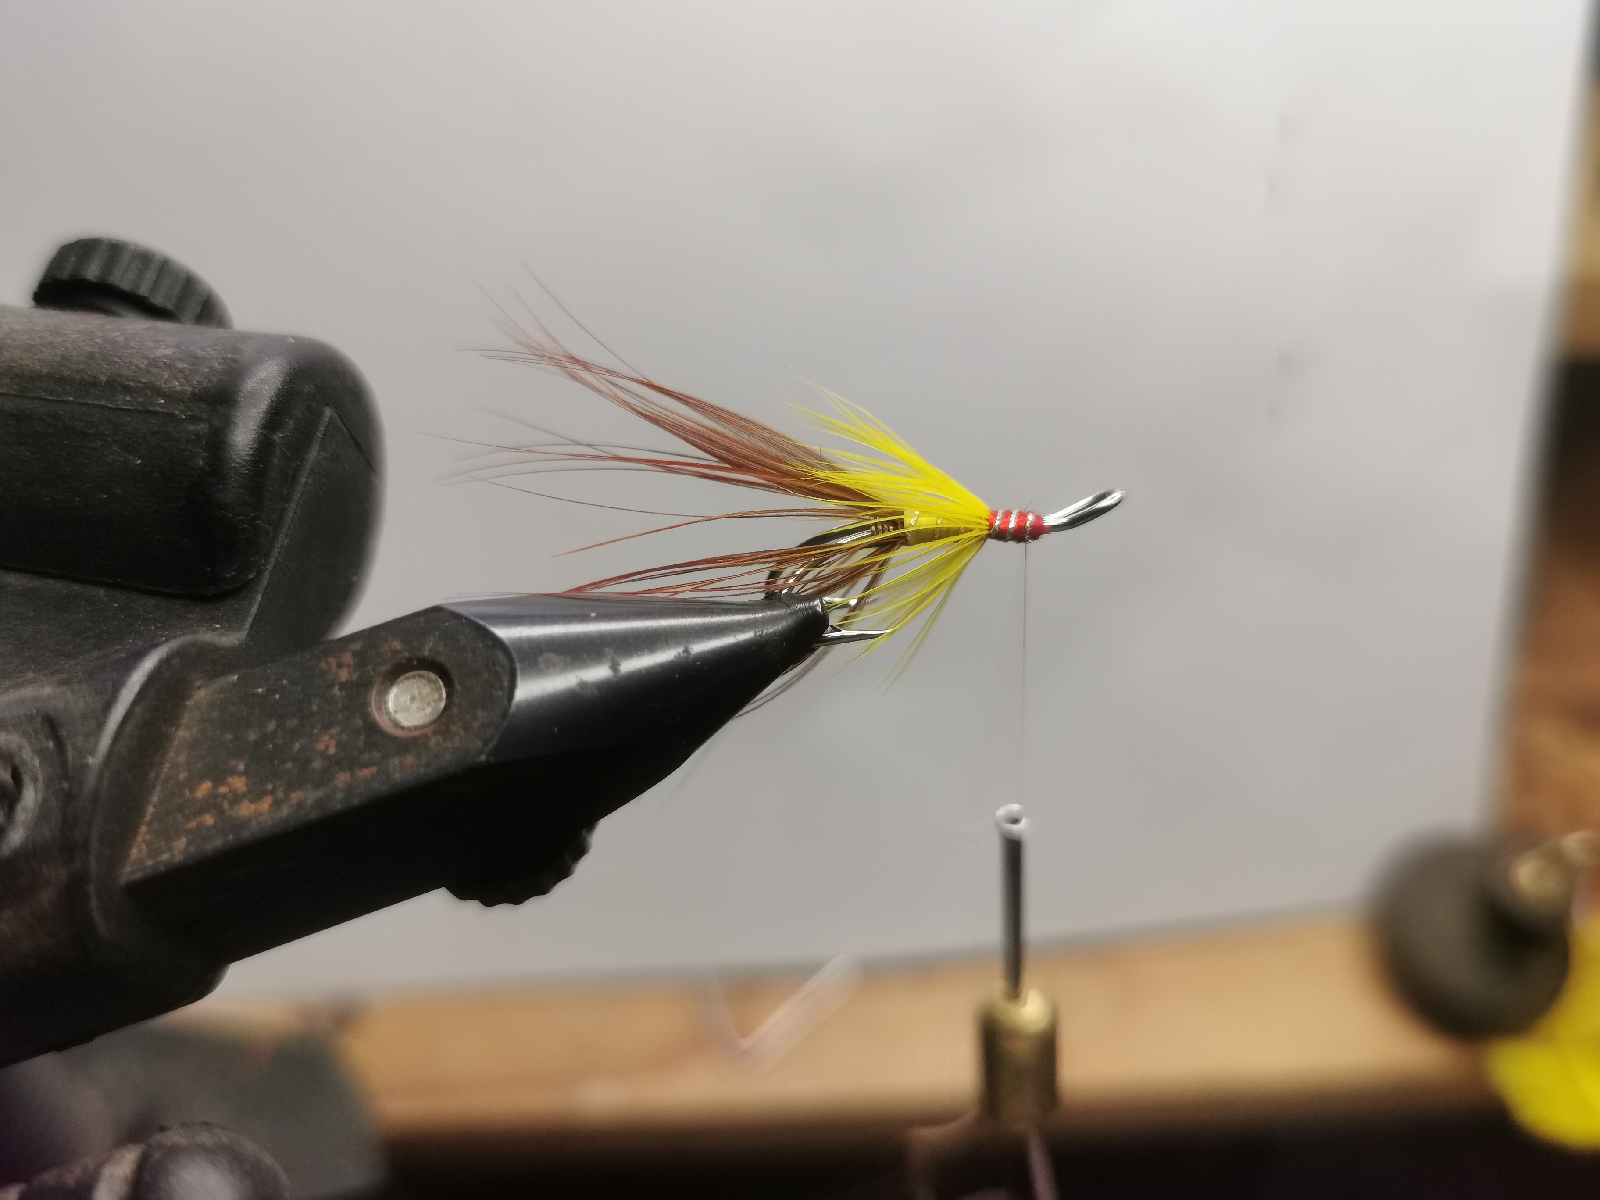
As you can see, the fly is now almost finished and there's no massive bulge of thread behind the eye and still a fraction of a gap between the thread and the eye.
We'll now add jungle cock with three turns rearward.

Now fold the stalks of the Jungle cock eyes backwards and secure in place with three turns of thread forward again towards the eye. And trim off the waste ends of the JC feathers.

You can whip finish at this point and varnish if you wish. I like to round my heads off slightly so I'll add more turns.

Now I'll whip finish and varnish. And we have a nicely finished Apache Shrimp

Again, with all my tying and step by steps, I am in no way saying that this is way flies should be tied and everything else is wrong. Absolutely not. I'm merely showing the way that I, personally, am tying my flies at the minute and there might be something in there that someone might find useful.
betmatik
ReplyDeletekralbet
betpark
tipobet
slot siteleri
kibris bahis siteleri
poker siteleri
bonus veren siteler
mobil ödeme bahis
W6W
canlı sex hattı
ReplyDeletehttps://girisadresi.info/
salt likit
salt likit
4LT5M
diyarbakır
ReplyDeletedüzce
edirne
elazığ
erzincan
LAİU15
samsun
ReplyDeleteşişli
elazığ
kadıköy
ordu
88G6D
https://saglamproxy.com
ReplyDeletemetin2 proxy
proxy satın al
knight online proxy
mobil proxy satın al
YUM65Z
شراء اثاث المستعمل بالرياض
ReplyDeleteشراء اثاث مستعمل
شركه مكافحه النمل الابيض بالقصيم lUbHdnmfIW
ReplyDeleteشركة تنظيف افران ببريدة udUulIYzpI
ReplyDelete